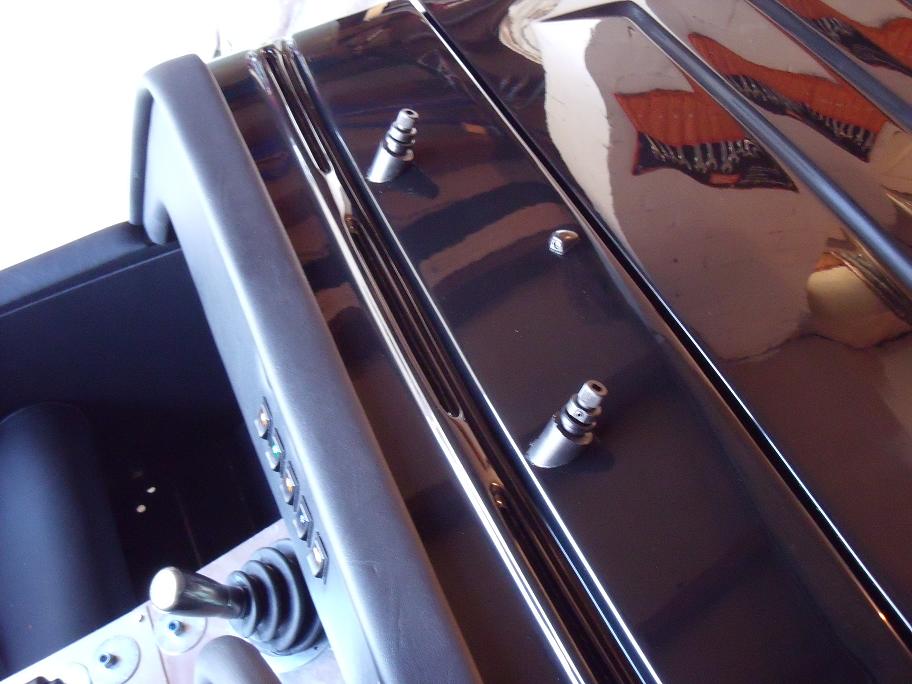
January 19th 2013 - Tunnel Cover Panel & Rear Bulkhead Carpet
Too cold to do much today, but to keep at least some momentum going I fitted the final tunnel cover plate above the handbrake adjuster and propshaft coupling. The other two panels are fitted using self-tapping screws, but for this one I used rivet nuts and M5 dome headed bolts as it may need to come off for maintenance. Whilst in that area I couldn't resist fitting the rear bulkhead carpet using double-sided velcro.
January 12th 2013 - Dashboard fitting
Mainly preparatory work over Christmas, and also the arrival of a great new rivet nut tool (how sad to get excited over a new tool!) which was put to use to great effect today to fit the dashboard. The manual says to use standard nuts, but I figured the space behind the dash will be restricted and the dash is something that may need to come off from time to time.
It was easy to get the rivnuts in to the correct tightness with the new tool with minimal effort - just turn the wheel at the back, then unscrew. The dash was then put in place, with the dash top trim in place and masking tape placed around the edge of it to indicate the area for drilling the holes so the bolt heads would not be visible.
The trim panel was then stuck in place using Velcro strips. I'm tempted to put a bolt in as well to secure it.
Last job of the day was to fit the gearlever gaiter. I reduced the height of the supplied gaiter slightly, then made holes in it so that the four long pop rivets would hold the whole lot securely in place. It was then simple job to fit what seems like the the 5000th rivet.
| New Rivet Nut Tool |
| Rivet nuts in place around the scuttle edge |
| Dash bolted in place before the top trim panel was added |
Last job of the day was to fit the gearlever gaiter. I reduced the height of the supplied gaiter slightly, then made holes in it so that the four long pop rivets would hold the whole lot securely in place. It was then simple job to fit what seems like the the 5000th rivet.
| Gear lever gaiter cut and positioned so that the lower edge will be sandwiched in place |
| Finished dash area looks smart. Major wiring job looming :-) |
December 15th 2012 - Interior Panels
The interior panels are stated as optional in the manual and although they reduce the already limited interior space further they make it look far more "finished" so I decided to fit them. First job was to attach the cushioned pads which protect edges from scuffs as you get in and out using some long black-headed "peel" rivets purchased off ebay. These are just the job as they are not obtrusive and spread the load when attaching things like trim panels as can be seen on this photo of the underside of the handbrake panel:
Another quick job while the black rivets were out was the handbrake surround. This was drilled and riveted in place off the car to avoid the risk of drilling into anything vital!
| Peel rivets spread the load |
The side panels then fitted naturally onto the sides of the car and were attached in the same way - being careful to drill into the chassis rather than thin air or the edge of the floor pan. The manual says this is easiest done before the scuttle is fitted, but I managed OK without removing it.
| Looks much tidier. Shame the can't be said of the garage! |
November 18th 2012 - Dashboard switches & lights
Not much progress this weekend due to Matthew having a new and much more powerful go-kart which he kept pointing forward for almost 50% of the time, bending two steering arms and a bumper in the process!
Given the limited remaining time and the need to keep some momentum on the build, I opted for the easy indoors job of fitting the warning lights and switches to the almost-time-for-it-to-go-on-at-last dashboard. This was simply a matter of working out what goes where and using a craft knife to cut holes in the vinyl where there was already a suitable size hole in the aluminium backplate.
For IVA, the switches will need labels which, in theory, Westfield should have provided. I can't seem to find any though, so it will probably require a quick browse of the Internet.
| Full complement of lights and switches look easy to read..... without the steering wheel in the way! |
November 11th 2012 - Scuttle back on
After the simple task of shortening the heater input/output pipes and making two holes for them to connect through to the engine bay, the scuttle assembly was finished. Now a lot heavier than it was, it went back on without fouling anything. Its now quite busy under there, but seems to fit together well.
The manual says the optional side trim panels should be fitted before the scuttle is secured, so out came the seats and the panels went in after cutting out the holes for the seatbelt anchors. At this point I trial fitted the dash and the pad on top of the side to see how they will fit together.
Work then came to a halt as I couldn't find the required "peel" rivets to attach the side trim panels. Should look good when its done though..... provided the seats will still move when they go back in.
| Scuttle back on. Dash an trim trial fitted |
Work then came to a halt as I couldn't find the required "peel" rivets to attach the side trim panels. Should look good when its done though..... provided the seats will still move when they go back in.
November 3rd 2012 - Wipers & Heater
For once a reasonable amount of time available and good progress to show for it! I'd actually fitted the wiper wheel boxes a couple of months ago, but managed to kink one of the aluminium pipes through which the wiper rack feeds whilst attempting to put the required (quite tight) curve in it - not an uncommon problem judging by comments on the WSCC owners club forum. Rather than try to get another piece from Westfield and probably have the same issue, I bought a metre of 10mm copper pipe off eBay on the grounds that it is a) cheap (£3) b) easier to bend and c) long enough to have 2 or 3 goes. Inevitably, one go was enough - made easier by cutting it slightly long, bending it, then cutting to the right length. I then removed the nut from the kinked pipe, put it on the new one and hammered a suitable socket into each end to flare them.
During this process, I fitted the wiper motor to the bulkhead after putting the latter back on the car temporarily to find the perfect place for it - high enough to miss the ECU and relays, low enough to not need a tight bend in the aforementioned pipe. The motor had to be removed again to feed the wiper rack through the pipes and wheel boxes (adding grease in the process), but it was worth the effort:
Next job was to fit the washer jet. The manual says there's an indent in the scuttle to indicate its position. There wasn't, so I used a photo I'd taken on the Westfield stand at the Donington kit car show as a guide. I also moved the washer tube from the washer bottle to fit it on the washer jet - my logic being that this will be difficult once the heater's in. I'll need to think about how to route it over or through the bulkhead later.
During this process, I fitted the wiper motor to the bulkhead after putting the latter back on the car temporarily to find the perfect place for it - high enough to miss the ECU and relays, low enough to not need a tight bend in the aforementioned pipe. The motor had to be removed again to feed the wiper rack through the pipes and wheel boxes (adding grease in the process), but it was worth the effort:
| Wiper motor, rack and wheel boxes from inside the scuttle |
| Wiper spindles and washer jet |
And so the heater came out of its box. Once again, the photos from Donington came in useful to confirm which way up it goes (no picture in the manual) and it simply bolted in to the middle of the scuttle, as near to the top as is possible. It was then just a matter of adding the pipes to the demist vents and the outlets which will point into the footwells to make motoring in freezing (i.e. British summer) weather more bearable.
| Heater. Hope it works |
Unfortunately, time ran out before I could make the holes through the scuttle for the pipes to the cooling system. That will have to wait until next time, which should then allow the whole (now heavy) assembly to go back on the car. Now that will be progress!
October 15th 2012 - Cycle wing & exhaust heat shield
Cheap drill bits are a false economy. Last weekend I wasted a couple of hours attempting to drill through the cycle wing brackets with limited success. Onto Amazon for a next day delivery of a couple of cobalt drill bits (as used for the chassis panelling but 5.5mm rather than 4) and the 6 remaining holes took no more than 15 minutes! They were then bolted back on, the wheel removed and some holes drilled through the taped in place wings after adding a strip of foam cushioning. Some people use bonded in bolts to avoid having visible bolt heads, but I decided that it would be more important to have confidence they're not about to fall off. To reduce the risk of cracking of the wings I used some slightly bigger washers:
Fitting the nearside wing will have to wait as I noticed the powdercoating was loose around the mounting holes on the bracket and scratching it away revealed some rust. A quick coat of Hammerite will sort it, its just a bit annoying not to be able to finish the job.
Not disheartened though, I decided to fit the exhaust heat shield - as much as to get the parts out of the way as anything.... and it seemed like a nice simple yet highly visible job. And so it turned out to be - just a case of opening up the two huge jubilee clips, feeding them through two channels on the inside of the heat shield and fastening the clips up again.
Note the absence of the scuttle in this picture - its still on the bench awaiting fitment of the wiper motor. More on that soon I hope.
Fitting the nearside wing will have to wait as I noticed the powdercoating was loose around the mounting holes on the bracket and scratching it away revealed some rust. A quick coat of Hammerite will sort it, its just a bit annoying not to be able to finish the job.
Not disheartened though, I decided to fit the exhaust heat shield - as much as to get the parts out of the way as anything.... and it seemed like a nice simple yet highly visible job. And so it turned out to be - just a case of opening up the two huge jubilee clips, feeding them through two channels on the inside of the heat shield and fastening the clips up again.
Note the absence of the scuttle in this picture - its still on the bench awaiting fitment of the wiper motor. More on that soon I hope.
Subscribe to:
Posts (Atom)